Seamless File Transfer from TeleBox to Google Drive with Cloudslinker
File transfers between varied cloud storage services can often be complex. Cloudslinker, however, greatly simplifies this task. This article discusses how Cloudslinker can effectively assist in moving your files from TeleBox to Google Drive, enhancing your cloud storage management.
Introduction
In the current era of digital connectivity, managing files across different cloud storage services is a frequent necessity. For those who need to transfer data from TeleBox to Google Drive, Cloudslinker presents a straightforward and effective method. This guide outlines how Cloudslinker can be used to facilitate a smooth transfer of your files, suitable for both professionals and individuals looking for easy cloud storage management.
Moving from TeleBox to Google Drive offers numerous benefits, enhancing your digital file management experience:
- Improved Collaboration: Google Drive's advanced collaborative features, such as real-time editing and easy file sharing, are superior to TeleBox, particularly for team-based projects.
- Seamless Google Workspace Integration: Google Drive integrates flawlessly with Google Workspace tools, enhancing productivity and workflow.
- Superior Security: Google Drive's advanced security measures, like SSL encryption and two-factor authentication, offer enhanced data protection compared to TeleBox.
- User-Friendly Interface: Google Drive's intuitive and straightforward interface surpasses TeleBox, simplifying file management.
While TeleBox provides essential cloud storage and sharing capabilities, it falls short in areas such as collaboration, integration with productivity apps, and user interface intuitiveness, making Google Drive a more comprehensive choice for effective digital file management.
Mastering Cloudslinker for TeleBox to Google Drive Transfers
Cloudslinker provides a seamless solution for transferring data between cloud platforms like TeleBox and Google Drive, enabling efficient cloud-to-cloud transfers. This tool is particularly effective for continuous synchronization tasks and offers advanced filtering options and a user-friendly interface. For comprehensive guidelines and further information, you can refer to the Knowledge Base.
Step 1: Getting Started with Cloudslinker
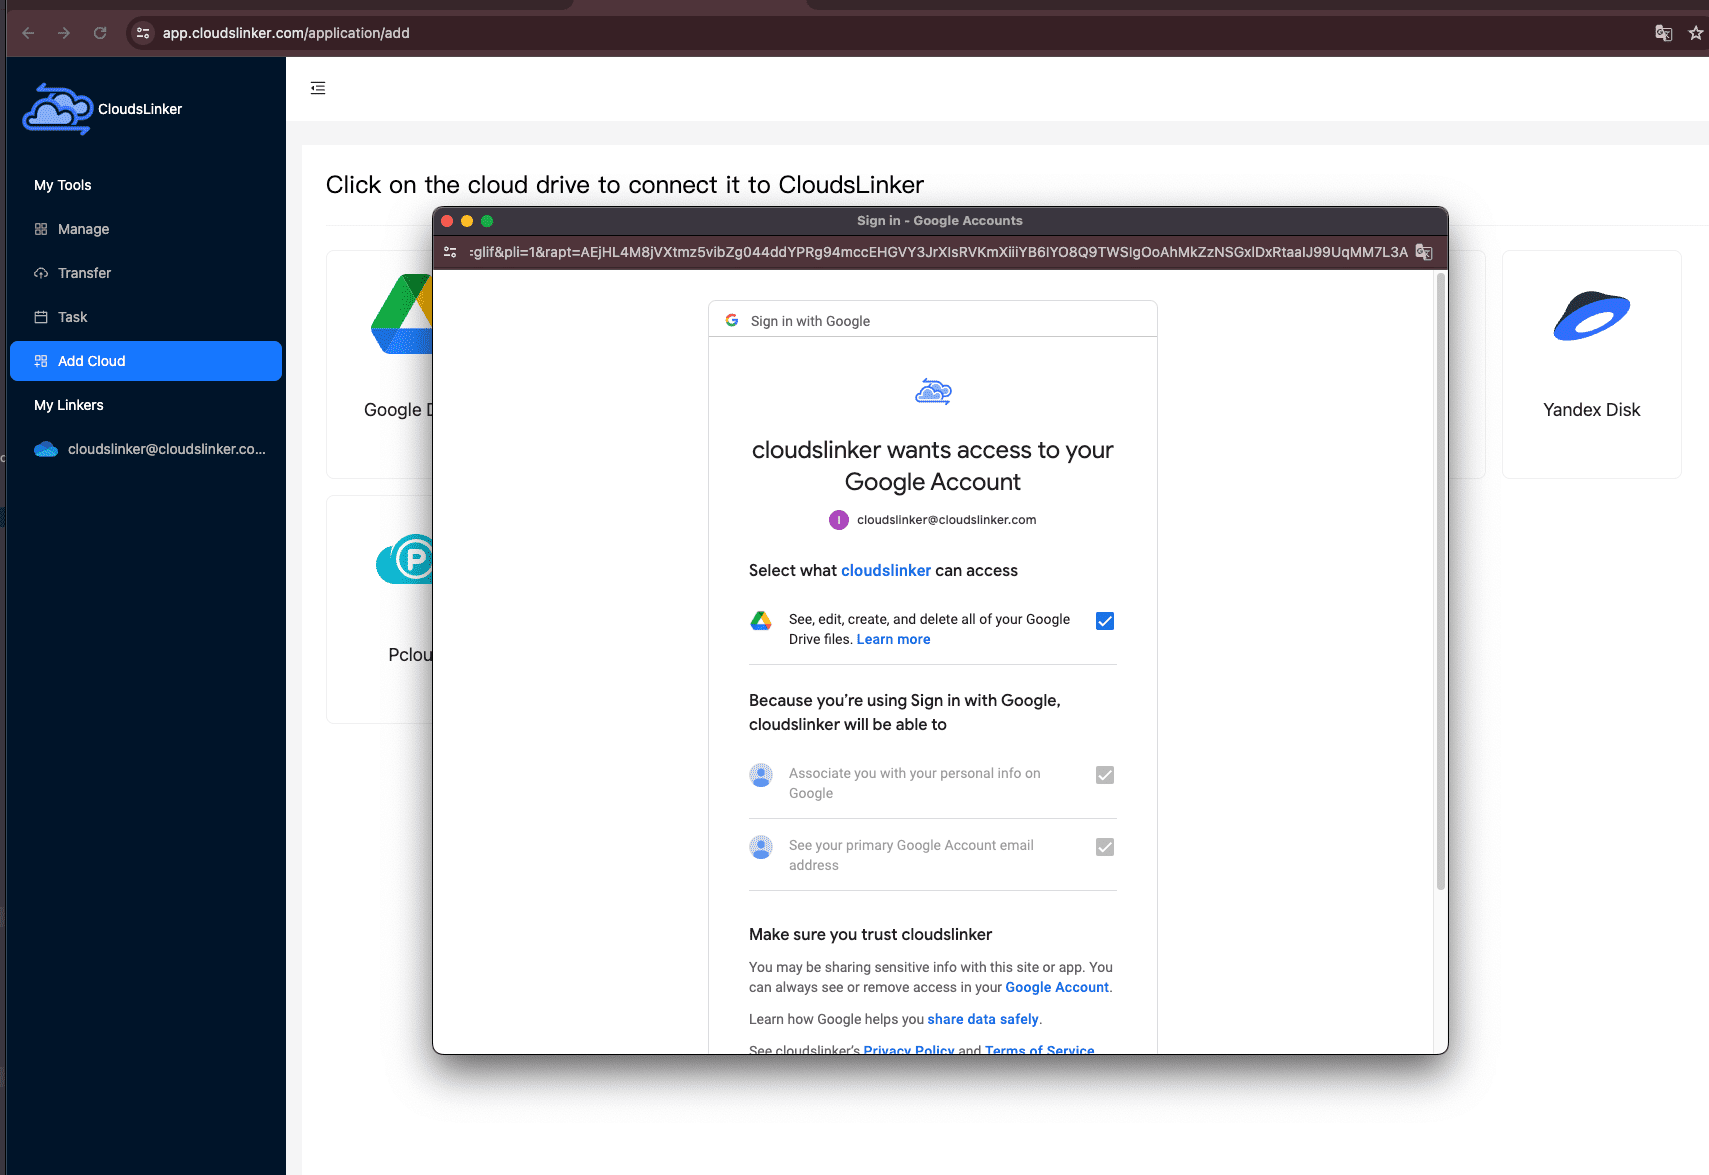
Begin by logging into Cloudslinker. This is where you'll integrate your cloud storage accounts. Start with adding your Google Drive account, granting Cloudslinker the necessary permissions for managing and facilitating transfers.

Step 2: Integrating Your TeleBox Account
To add your TeleBox account to Cloudslinker, you'll need to first acquire a specific access token from TeleBox. This can be obtained by navigating to the TeleBox Administration Portal. Log in to your TeleBox account and then proceed as follows:
- Click on My Account.
- Locate the Token section and copy the access token.

With the token in hand, return to Cloudslinker to finalize integrating your TeleBox account, establishing a secure link for your file transfer operations.

Step 3: Configuring Transfer Settings in Cloudslinker
In Cloudslinker's 'Transfer' section, choose TeleBox as the source and Google Drive as your destination. This setup is essential for directing the transfer of files from TeleBox to Google Drive.

Cloudslinker offers filtering options, allowing you to select specific file types or sizes for the transfer. For guidelines on this setup, see Cloudslinker's Filter Settings.
Additionally, Cloudslinker supports scheduled transfers. Arrange these to occur at your convenience – daily, weekly, on specific dates, or as a one-time task. For more on this, check out the Cloudslinker Schedule Settings guide.
Step 4: Monitoring Transfer Progress
Monitor the status of your transfer tasks in the 'Task' section of Cloudslinker. This feature is crucial for overseeing and managing the transfer process, allowing you to adjust or cancel tasks as necessary.

Step 5: Confirming the Completion of Your Transfer
After the transfer process, ensure your files have successfully moved from TeleBox to Google Drive. It's important to verify the integrity of the transferred files and confirm that all required files are now in your Google Drive account.

Conclusion
Using Cloudslinker to transfer files from TeleBox to Google Drive is both simple and efficient. The process includes steps like logging into Cloudslinker and confirming transfer completion, all designed for user-friendliness. Cloudslinker's features like file filtering and transfer scheduling further add to its practicality, making it an excellent choice for effortlessly managing files across multiple cloud platforms.
Online Storage Services Supported by CloudsLinker
Transfer data between over 44 cloud services with CloudsLinker
Didn' t find your cloud service? Be free to contact: [email protected]
Further Reading
Effortless FTP connect to google drive: Transfer Files in 3 Easy Ways
Learn More >
Google Photos to OneDrive: 3 Innovative Transfer Strategies
Learn More >
Google Photos to Proton Drive: 3 Effective Transfer Techniques
Learn More >


